Linux

feature for NeDi default Topology Map

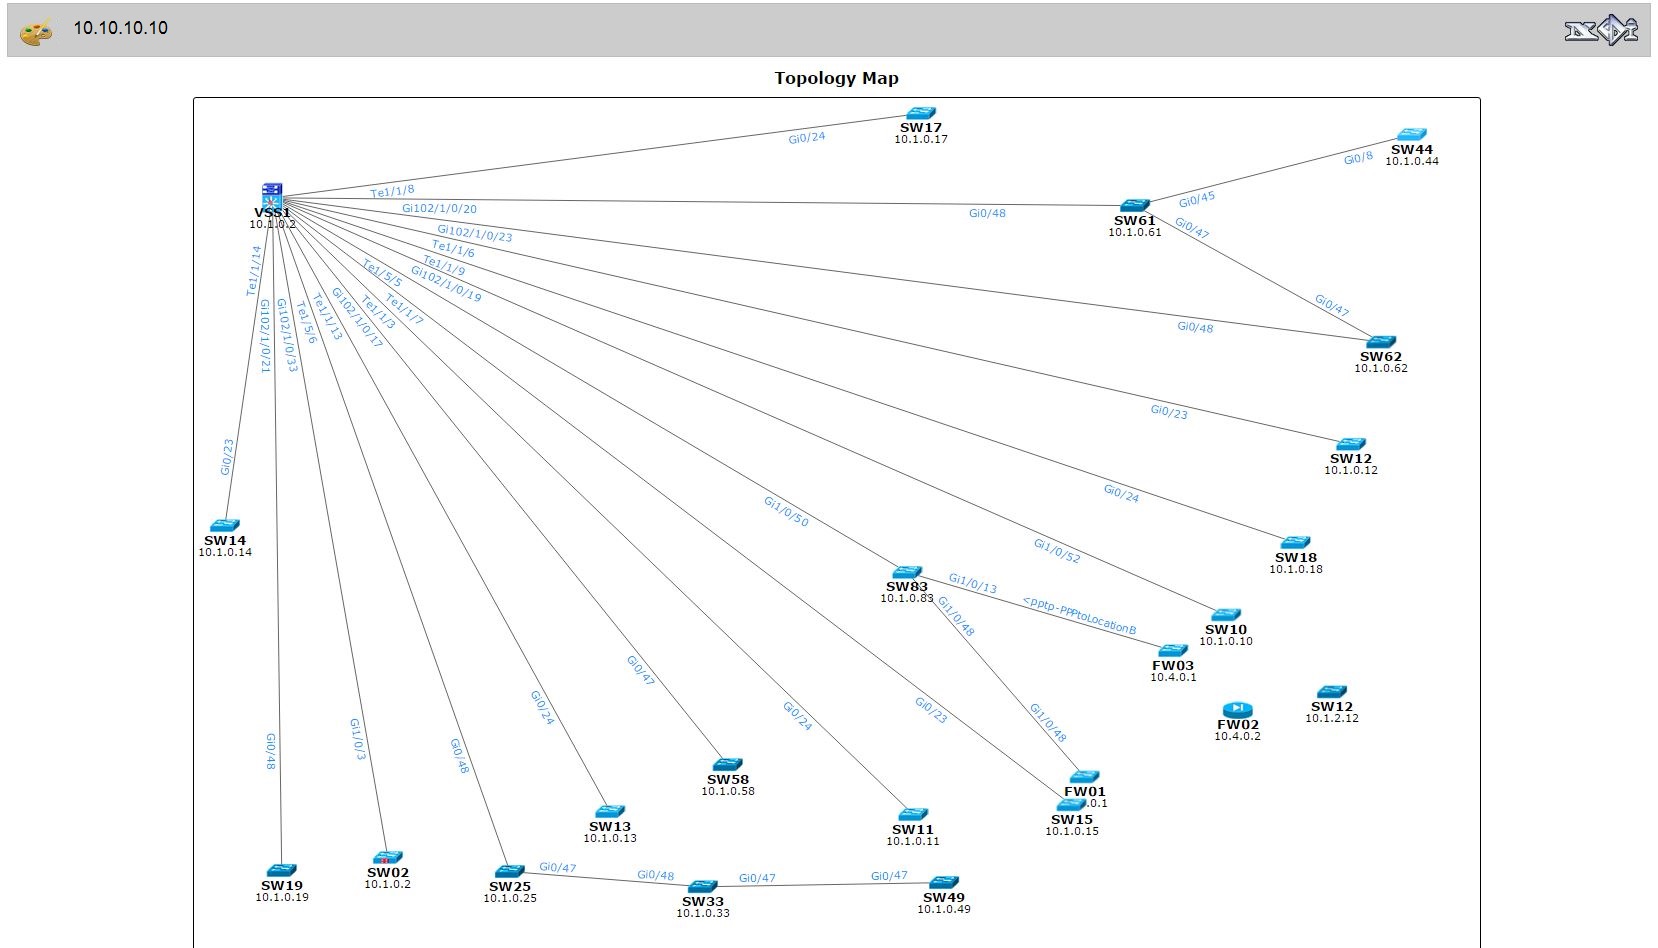
Because of our requirements I have changed the Topology-Map, primary the d3.js / json part.
It does work, but I think the implementation in the libmap.php can be better.
It’s not finished yet. I’m open for suggestions and feedbacks.
Additional features like save positions, map zoom, change background and more will be implementend soon.  For more information please visit the NeDi-Forum http://forum.nedi.ch/ .

Warn:
The code is in the alpha phase.
This is coded for the NeDi version 1.5 .

Info:
I didn’t touch the original functions in the libmap.php file.
I copied it and created two new functions with my changes.
When you call the Topolgy->D3jsmap it creates a new json map file called “map3js_$username.json” instaed of “map_$username.json”

WriteJsonNew()
MapNew()

Install:

1.
please backup the original file first.
like that \hmtl\inc\libmap.php.backup

2.
copy the two files on your nedi HTML folder.
\html\Topology-D3jsmap.php
\hmtl\inc\libmap.php

3.
edit nedi.conf and put this line on GUI Settings.
module    Topology   D3jsmap         paint   net

Options:

1. Filter:
I haven’t change anything here.

2. Main
In the d3js map I have only changed the D3js code for my expected results.
I have focused on the Output from the Devices and Nodes(nodes without interface).

3. Layout
Metric: you can set the Charge of the forcelayout                 // lal default is 120, 120/4=30
Length: you can change the link distance between devices or nodes    // len default default is 50, -3*50=-150

4. Show
If Name: show the linked interface between the two devices
Device IP: show the device IP expected in nedi

Room: show the room from the snmp string
OR
Rack: show the rack from the snmp string

When you select both Room and Rack then it show the complete snmp string
Region.City.Building.Floor.Room.Rack

To better indentifying the devices on the same building or room, they have the same font color.

Mode: show the device contact
Mode: show the device model

Tipp:
Go to print mode and then position your devices to print as PDF… or so.
Default Output with Interface like SVG and PNG output… but you can place your devices vy yourself .

nedi_output

Multiple Links
multiple_links


Create Binary Image with Linux

To create an image file on Linux we have various options to do the job. We have commands like dd, truncate, mkfile and others. On most linux systems we have fallocate installed by default. The command fallocate is supported only on certain file systems such ext4, xfs, ocfs2 and btrfs.  The best choice to create a large file on a Linux system is the command fallocate. Fallocate only allocates/reserves blocks and marking them as uninitialized without requiring I/O and CPU time. This is much faster than creating a file by filling it with zeros like the command dd does.


To make sure we have sufficient disk space to create an image file, we use the command df.

root@OSMIOM:/var/www# df -h /var

Output:

Filesystem              Size  Used Avail Use% Mounted on
/dev/mapper/OSMIOM-var  6.0G  1.3G  4.4G  22% /var
root@OSMIOM:/var/www#

We can see, that we have enough disk space to create some image files.  To create an image file we use the command fallocate.

Syntax:

fallocate -d [-o offset] [-l length] filename


Example to create a 100 Megabyte file:

root@OSMIOM:/var/www# fallocate -l 100M myfile.img

Example to create a 1 Gigabyte file:

root@OSMIOM:/var/www# fallocate -l 1G myfile.img

Example to create a 10 Gigabyte file:

root@OSMIOM:/var/www# fallocate -l 10G myfile.img

Let’s verify our new file.:

root@OSMIOM:/var/www# ls -lh myfile.img

Output:

-rw-r--r-- 1 root www-data 1.0G Mar 22 11:05 myfile.img
root@OSMIOM:/var/www#